Import transactions from a CSV file
When you have a manual bank account in rAInty, the way to bring transactions into the platform is to import them from a CSV file. You export this file directly from your online banking: almost all banks allow you to download the transaction list in this format.
Once you have exported the file, rAInty guides you step by step to read it correctly and turn it into usable transactions.
Where to find the feature
Open the bank account from the Banking menu, then look for the Import CSV icon on the account detail page. Click it to open the import wizard.
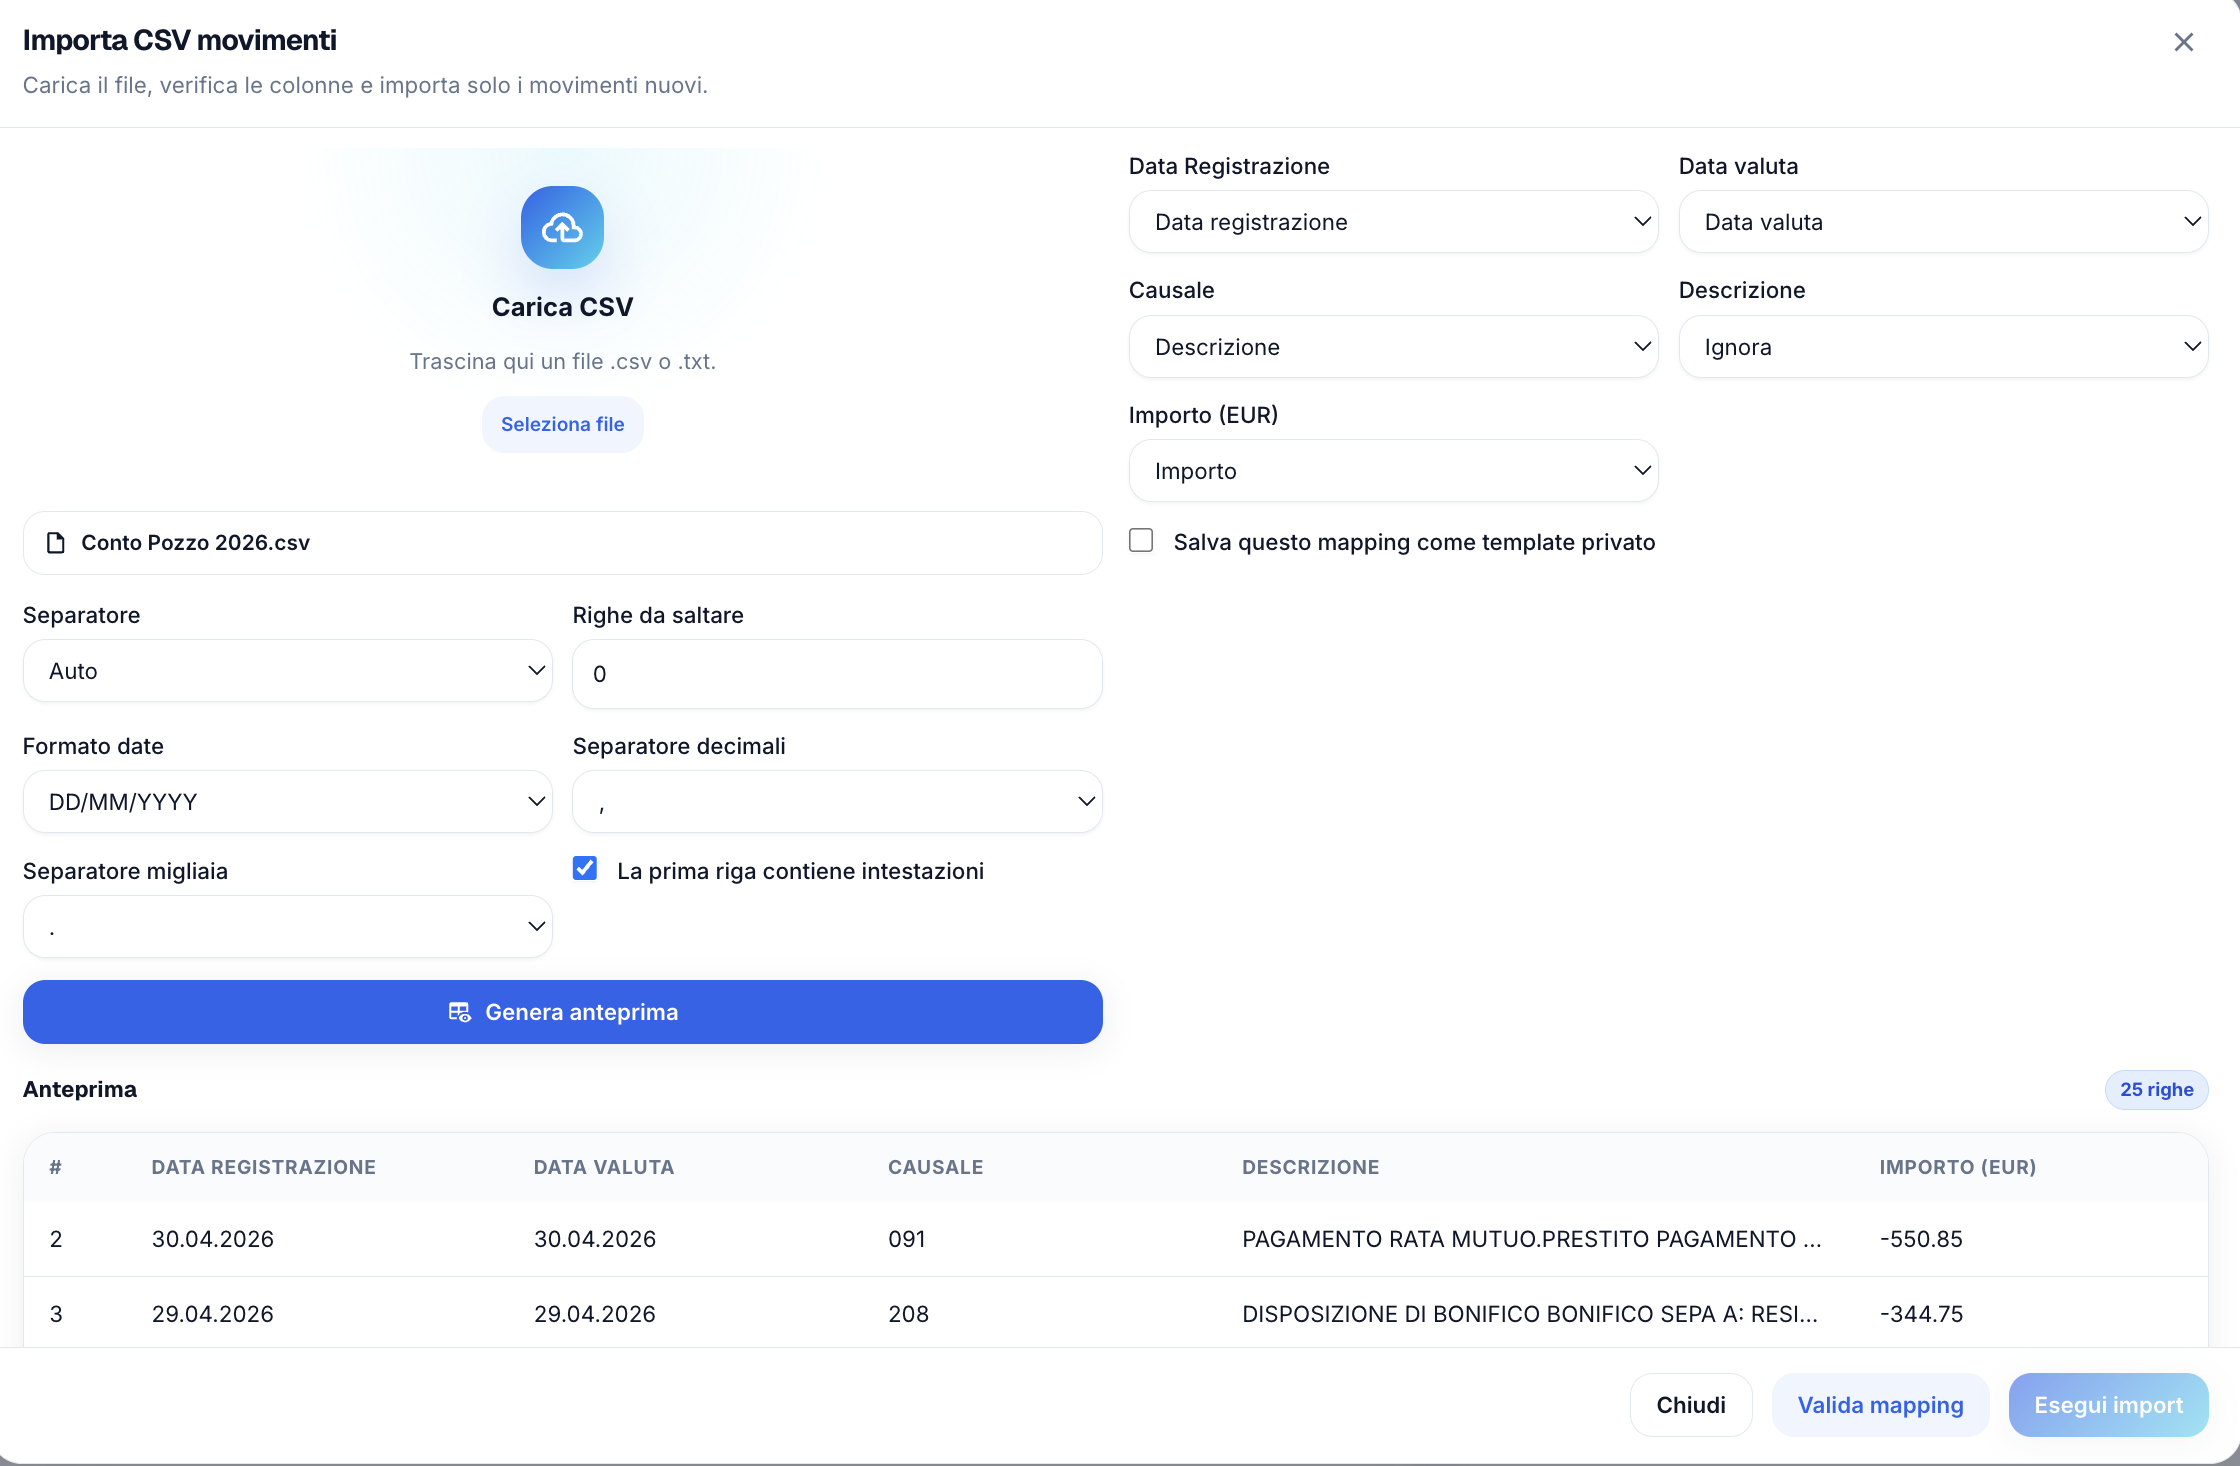
Upload the file
On the first screen you will find a dedicated area. Drag the CSV file directly into that area or click to select it from your computer.
Configure the reading parameters
Every bank exports files in slightly different ways. For this reason, before proceeding, rAInty asks for some information about how the file is structured.
The separator is the character that divides columns within the file. The most common options are a comma or a semicolon. If you are not sure which to use, try the semicolon first, as it is the most common among banks.
Rows to skip lets you exclude any initial rows that do not contain transactions, such as extra headers or bank notes. Usually skipping the first row is enough.
The date format indicates how dates are written in the file. For example, some banks use day/month/year, others year/month/day. Choose the one that matches the file you are importing.
The decimal separator and thousands separator relate to how numbers are written. This depends on your bank's export settings.
Check the preview
After setting the parameters, rAInty shows a preview of the rows that will be imported. This is the right moment to verify that the data makes sense: dates should be readable, amounts should be correct numbers and columns should be separated correctly.
If something in the preview does not look right, adjust one or more parameters and the preview updates accordingly. There is no risk of making mistakes at this stage: no data is written to the system until you actually run the import.
Map the columns
Once the preview is correct, move to the mapping step. On this screen you link the columns in your CSV file to rAInty's internal fields.
For example, you need to indicate which column contains the transaction date, which contains the amount, which contains the description, and so on. rAInty automatically suggests some matches, but you can correct them if needed.
When you have finished mapping the columns, click Validate mapping to check everything is consistent. If validation passes, click Run import to start the import.
After the import
Imported transactions appear in the transaction list of the bank account and can be matched to rent instalments, expenses, utility bills and other items, exactly like transactions from a directly connected account.
If you want to import a new file from the same bank in future, the parameters and mapping you configured can be saved as a template and reused, so you do not need to start from scratch each time.
Domande frequenti
Dove trovo il file CSV da importare?
Il file CSV lo esporti direttamente dal sito della tua banca, dalla sezione movimenti o estratto conto. La maggior parte delle banche offre questa opzione. Cerca una voce come "Scarica movimenti", "Esporta" o "Download CSV".
Cosa faccio se l'anteprima mostra dati sbagliati?
Prova a modificare i parametri di lettura, in particolare il separatore e il formato data. L'anteprima si aggiorna subito e puoi verificare il risultato prima di procedere. Nessun dato viene scritto finché non avvii l'importazione.
Devo rimappare le colonne ogni volta che importo un file?
No. Dopo la prima configurazione puoi salvare i parametri e la mappatura come template. La volta successiva puoi riutilizzare lo stesso template senza ricominciare da capo.
Cosa succede se importo due volte lo stesso file?
rAInty controlla la presenza di transazioni duplicate durante la validazione e le segnala prima dell'importazione, così puoi evitare di inserire gli stessi movimenti due volte.
Le transazioni importate da CSV funzionano come quelle di un conto connesso direttamente?
Sì. Una volta importate, le transazioni CSV possono essere collegate a rate di affitto, spese, bollette e altre voci esattamente come i movimenti di un conto con collegamento diretto.